Quy trình hoàn thiện bao gồm nhiều biến số tương tác: loại vật liệu mài, cài đặt máy, hóa chất compound, chất lượng nước, cách nạp chi tiết và xử lý sau quá trình. Khi một biến số sai lệch, cả mẻ có thể bị ảnh hưởng. Một phương pháp chẩn đoán có hệ thống — thay vì điều chỉnh theo kiểu thử và sai — sẽ giúp đưa ra giải pháp nhanh hơn và kết quả ổn định hơn.
Vấn đề thực sự: Xác định điều gì đang thực sự sai
Khi các chi tiết xuất hiện lỗi bề mặt, phản ứng tự nhiên là thay đổi ngay một thứ gì đó. Nhưng nếu không hiểu biến số quy trình nào đang gây ra vấn đề, những thay đổi đó thường khiến tình hình tệ hơn. Bước đầu tiên là xác định chính xác dạng khuyết tật — đó là vết xước, vết lõm, đổi màu, thay đổi kích thước hay vấn đề cặn bám?
- Độ nhám bề mặt hoặc vết xước: vật liệu mài quá mạnh, bị nhiễm bẩn, hoặc thời gian chu kỳ quá dài so với loại vật liệu hiện tại.
- Vết lõm hoặc vết va đập: mức tiếp xúc giữa các chi tiết quá cao, hoặc tỷ lệ vật liệu mài/chi tiết cần điều chỉnh.
- Đổi màu hoặc cặn bám: nồng độ hóa chất, chất lượng nước hoặc quá trình sấy cần được chú ý.
- Cạnh bị bo tròn hoặc mất chi tiết: xử lý quá mức hoặc hình dạng vật liệu mài quá lớn so với chi tiết của sản phẩm.
Bảng chẩn đoán: Ghép triệu chứng với nguyên nhân gốc rễ
| Triệu chứng | Nguyên nhân có thể | Cần kiểm tra | Điều chỉnh khuyến nghị |
|---|---|---|---|
| Độ hoàn thiện bề mặt không đồng nhất trong toàn bộ mẻ | Phân bố vật liệu mài không đều hoặc tiếp xúc giữa các chi tiết | Tỷ lệ vật liệu mài/chi tiết, tải máy, dòng chảy hóa chất | Điều chỉnh tỷ lệ, giảm kích thước mẻ hoặc thêm vật liệu đệm để lấp đầy thùng |
| Chi tiết xuất hiện vết xước hoặc vết bề mặt không mong muốn | Vật liệu mài bị nhiễm bẩn, hình dạng không phù hợp hoặc chu kỳ quá mạnh | Kiểm tra độ sạch của vật liệu mài, quá trình tách và thùng lưu trữ xem có lẫn vật liệu không | Làm sạch hoặc thay vật liệu mài, thử hình dạng nhẹ hơn hoặc kích thước nhỏ hơn |
| Cạnh bị bo tròn hoặc chi tiết chức năng bị mất | Xử lý quá mức hoặc vật liệu mài quá lớn so với chi tiết sản phẩm | Đo các kích thước quan trọng trước và sau chu kỳ thử nghiệm | Rút ngắn thời gian chu kỳ, dùng vật liệu mài nhỏ hơn, giảm tốc độ hoặc biên độ máy |
| Cặn bề mặt hoặc màng xuất hiện sau khi sấy | Hóa chất bẩn, chất lượng nước kém hoặc rửa không hoàn chỉnh | Chất lượng nước, nồng độ hóa chất, quy trình rửa và sấy | Sử dụng nước sạch, thay mới hóa chất đúng chu kỳ, cải thiện quy trình sấy |
| Độ sáng khác nhau đáng kể giữa các chi tiết | Điều kiện bề mặt ban đầu khác nhau hoặc xử lý không đồng đều | Bề mặt chi tiết đầu vào, phân loại mẻ, phân bố vật liệu mài | Phân loại chi tiết theo điều kiện ban đầu, chạy các mẻ riêng cho từng trạng thái bề mặt khác nhau |
Lựa chọn vật liệu mài và hóa chất: Ghép quy trình với vật liệu
Việc chọn đúng vật liệu mài cũng quan trọng như việc thiết lập thông số máy chính xác. Loại, kích thước và hình dạng vật liệu mài quyết định cách bề mặt được tinh chỉnh, trong khi thành phần hóa học của hóa chất kiểm soát khả năng cắt, làm sạch và độ sáng cuối cùng.
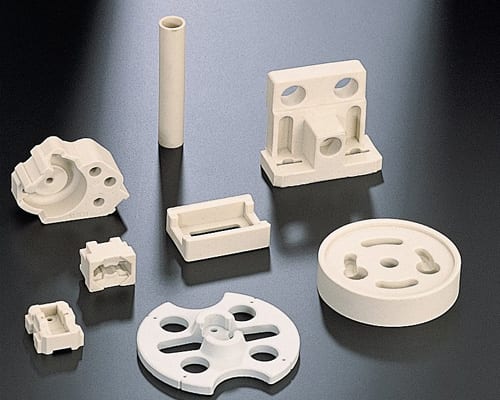
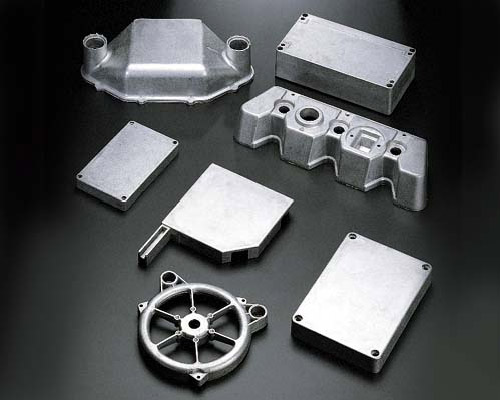
- Đối với phá ba via nặng: vật liệu gốm (ceramic media) cung cấp khả năng cắt mạnh phù hợp cho kim loại sắt và hợp kim cứng hơn.
- Đối với kim loại mềm và chi tiết tinh xảo: vật liệu nhựa (plastic media) cung cấp tác động cắt êm, bảo vệ các chi tiết tinh vi.
- Đối với hoàn thiện độ sáng cao: kết hợp vật liệu mài mịn với hóa chất hoàn thiện để đạt được cả độ nhám mong muốn và độ sáng.
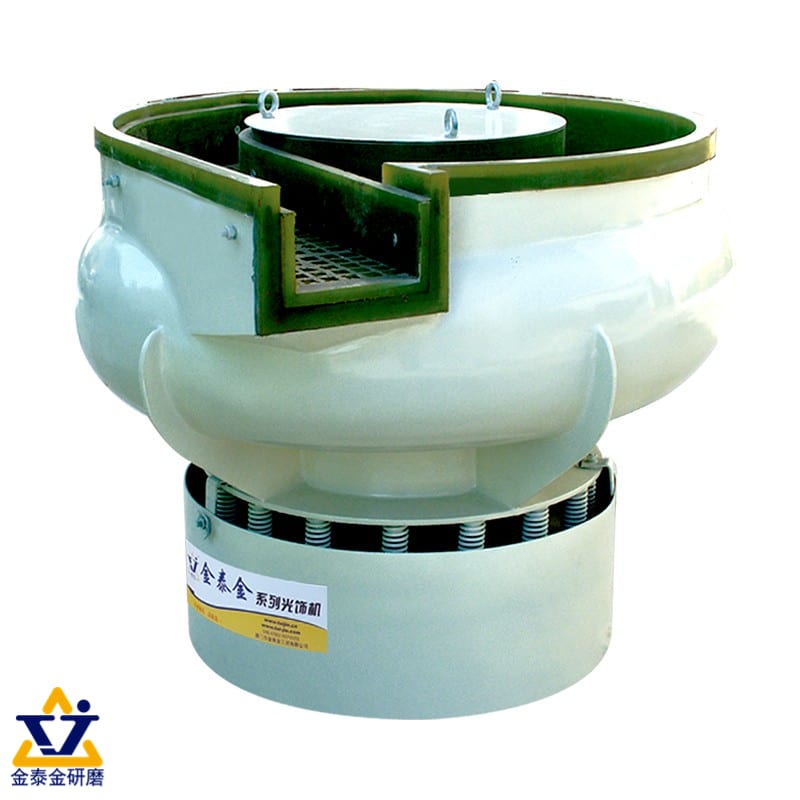
Xem quy trình trong thực tế
Xem cách thiết bị hoàn thiện bề mặt xử lý chi tiết trong môi trường sản xuất thực tế. Video này minh họa thiết bị và quy trình được đề cập trong bài viết:
Xây dựng quy trình hoàn thiện có kiểm soát
Để đạt kết quả tốt nhất, hãy cấu trúc quy trình theo từng giai đoạn thay vì cố gắng đạt hoàn thiện cuối cùng trong một chu kỳ dài duy nhất. Cách tiếp cận theo giai đoạn cho phép bạn kiểm soát từng biến số một cách độc lập và xác minh kết quả trước khi chuyển sang giai đoạn tiếp theo.
1. Làm mịn sơ bộ
Sử dụng vật liệu mài (media) cấp trung bình để loại bỏ ba via và giảm vết gia công. Giữ thời gian chu trình ở mức vừa phải và kiểm tra tiến độ theo các khoảng thời gian đều đặn.
2. Hoàn thiện cuối cùng
Chuyển sang vật liệu mài (media) mịn hơn để đạt chất lượng bề mặt mục tiêu. Giảm tốc độ hoặc biên độ máy nếu hình dạng chi tiết yêu cầu xử lý nhẹ nhàng hơn.
3. Tách và Rửa
Tách chi tiết khỏi media một cách cẩn thận. Nếu sử dụng quy trình ướt, hãy rửa kỹ bằng nước sạch để loại bỏ cặn hợp chất.
4. Sấy khô & Kiểm tra
Sấy khô chi tiết kịp thời để tránh vết nước. Kiểm tra dưới cả ánh sáng từ trên và ánh sáng bên trước khi đánh giá kết quả cuối cùng.
Cần xác nhận quy trình trước khi sản xuất hàng loạt? Hãy gửi cho chúng tôi vật liệu chi tiết, hình ảnh, kích thước, tình trạng bề mặt hiện tại và độ hoàn thiện mục tiêu. Chúng tôi có thể giúp đánh giá liệu vấn đề của bạn đến từ media, cài đặt máy, hợp chất, chất lượng nước hay cách xử lý sau hoàn thiện.
Những lỗi thường gặp cần tránh
- Chỉ kéo dài thời gian chu trình. Thời gian quá lâu có thể làm tăng nhiệt, bo cạnh và gây hư hại do va chạm giữa các chi tiết nếu nguyên nhân gốc là do media hoặc hợp chất.
- Chuyển ngay sang media có tính mài mòn mạnh hơn. Kích thước media nhỏ hơn hoặc hình dạng khác thường có thể giải quyết vấn đề mà không gây nguy cơ hư hại bề mặt.
- Bỏ qua độ sạch của media. Media bẩn, trộn lẫn nhiều loại media hoặc mạt kim loại trong bồn có thể làm xước các chi tiết đáng lẽ phải được đánh bóng.
- Bỏ qua các chu trình thử nghiệm. Luôn chạy một lô mẫu nhỏ trước để xác nhận quy trình trước khi sản xuất toàn bộ.
- Quá tải máy. Quá nhiều chi tiết trong một mẻ có thể gây hư hại do va chạm, hoàn thiện không đồng đều và kéo dài thời gian chu trình.
- Đánh giá chi tiết khi còn ướt. Lớp nước có thể che khuất vết xước và cặn bẩn cho đến khi khô mới lộ ra. Hãy kiểm tra sau khi sấy khô dưới ánh sáng phù hợp.
Giải pháp liên quan
Các trang này có thể giúp bạn so sánh các loại máy, media, hợp chất và quy trình phù hợp:
Cần tư vấn chuyên gia cho quy trình hoàn thiện của bạn?
Gửi cho chúng tôi vật liệu chi tiết, hình ảnh, kích thước, tình trạng bề mặt hiện tại, độ hoàn thiện mục tiêu và số lượng lô hàng. Đội ngũ của chúng tôi có thể đề xuất các "máy hoàn thiện", media, hợp chất và hướng dẫn quy trình thử nghiệm phù hợp cho ứng dụng cụ thể của bạn. máy hoàn thiện Yêu cầu hỗ trợ quy trình cho bạn.
 +86-592-2381506


 Mạng IPv6 được hỗ trợ