Cách đánh bóng các bộ phận xe máy bằng nhôm mà không bị vết va đập hoặc độ bóng không đều
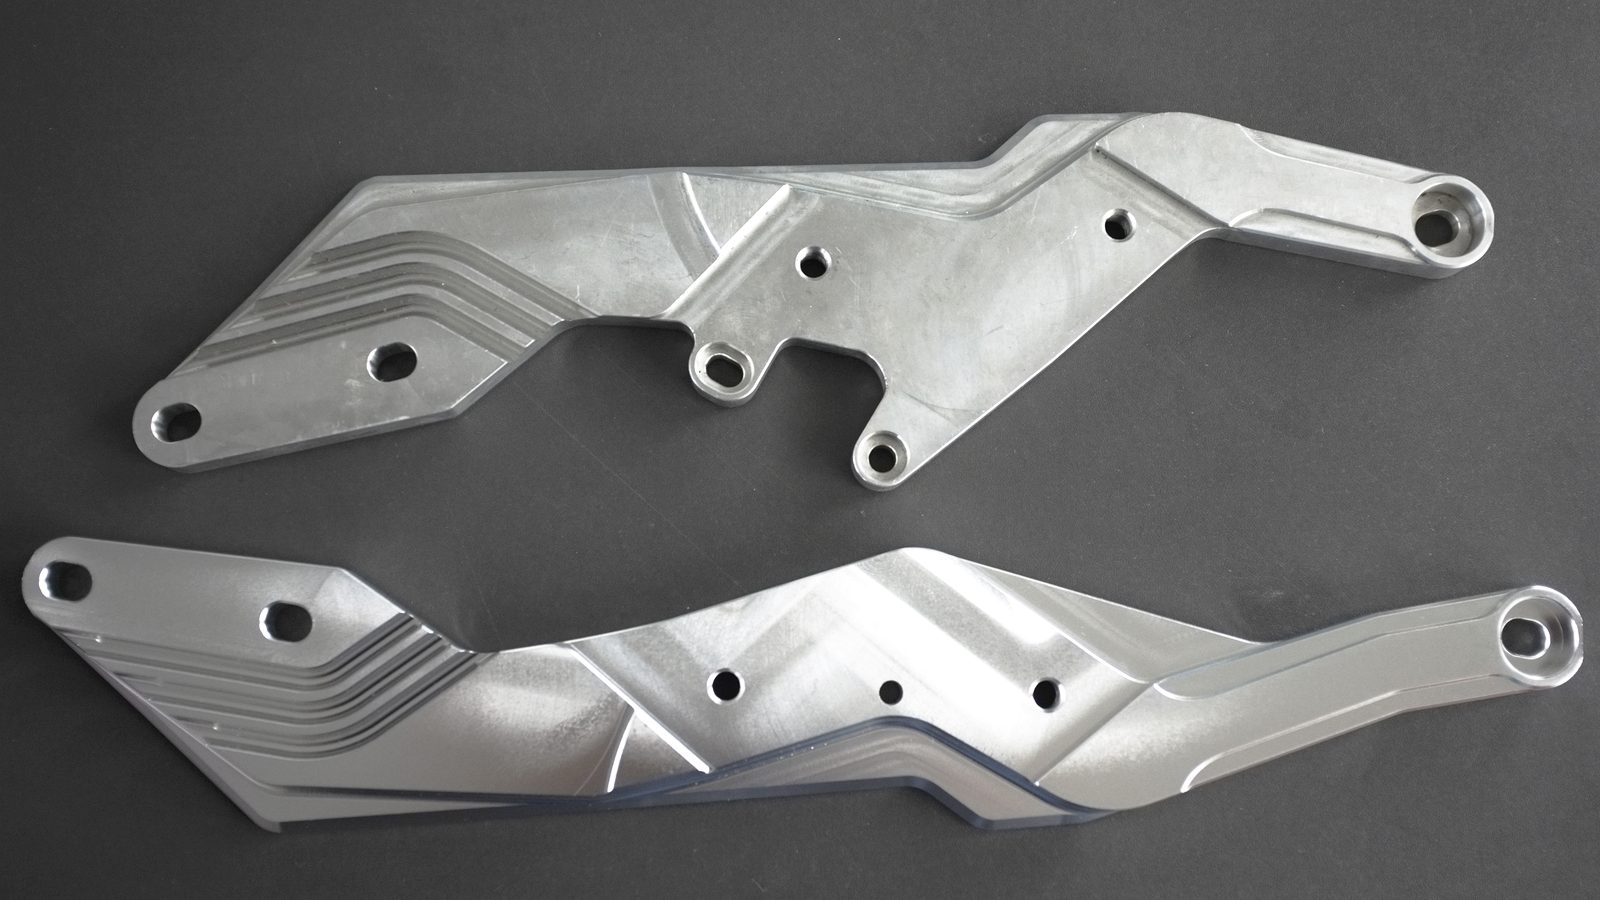
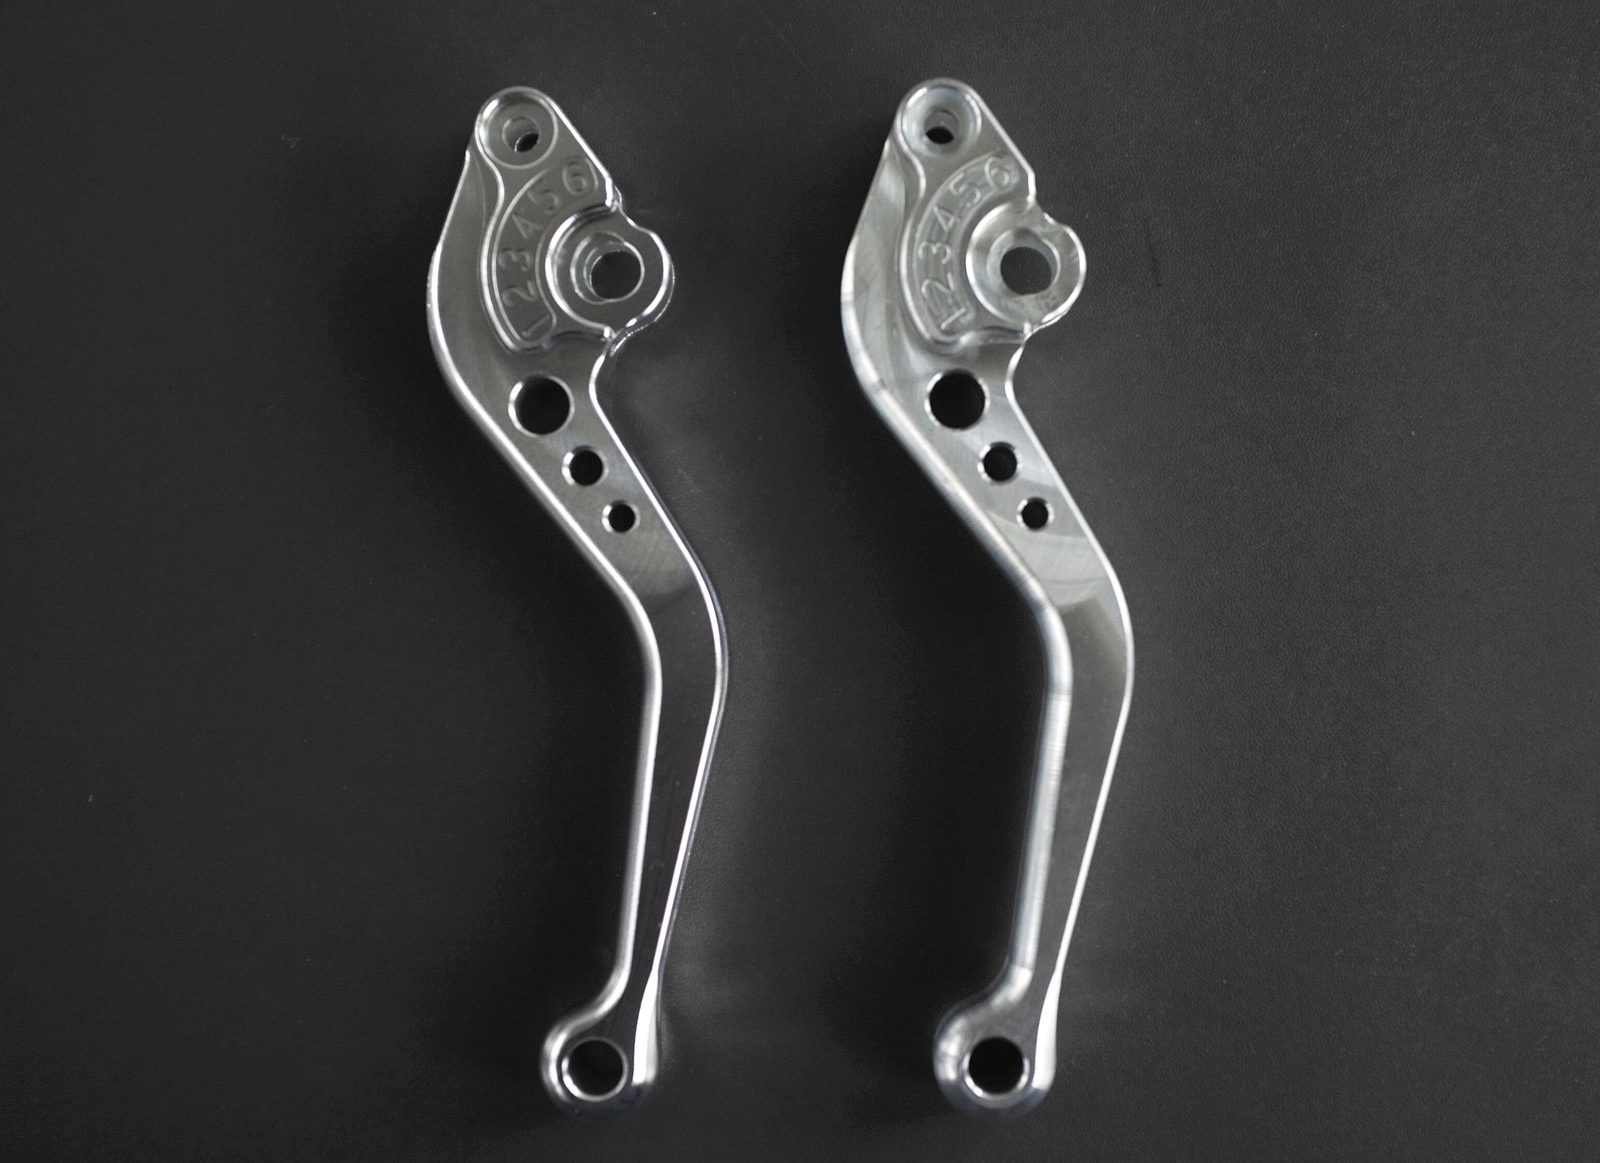
Các bộ phận xe máy bằng nhôm thường cần bề mặt sạch, sáng và đồng đều, nhưng chúng cũng dễ bị hư hại trong quá trình hoàn thiện hàng loạt. Tay phanh, tay nắm, giá đỡ, nắp che và các chi tiết trang trí dài có thể bị móp, mờ đục, độ bóng không đều hoặc bo tròn cạnh nếu quy trình không được kiểm soát.
Vấn đề thường không chỉ nằm ở máy móc. Đó là toàn bộ quy trình: hình học chi tiết, hỗ trợ vật mài, lực cắt, tỷ lệ nạp, hợp chất, thời gian chu kỳ, tách chi tiết và sấy khô. Hướng dẫn này giải thích cách chẩn đoán lỗi và xây dựng một quy trình đánh bóng an toàn hơn cho các bộ phận xe máy bằng nhôm.
Vì sao các bộ phận nhôm xe máy khó hoàn thiện
Các bộ phận xe máy thường dài, cong, mỏng và có nhiều lỗ, gân, rãnh hoặc bề mặt trang trí. Những đặc điểm này làm cho chi tiết hấp dẫn hơn, nhưng cũng tạo ra rủi ro trong quá trình hoàn thiện.
Trong quá trình hoàn thiện hàng loạt, các cạnh lộ ra có thể bị tiếp xúc quá mức trong khi các rãnh sâu hoặc góc trong lại bị mờ. Các chi tiết dài có thể va vào nhau nếu tải quá dày. Các lỗ và rãnh có thể giữ lại vật mài. Một quy trình hoạt động tốt cho khối nhỏ hoặc vật đúc đơn giản có thể không phù hợp cho tay gạt hoặc giá đỡ xe máy.
Chẩn đoán lỗi trước tiên
Trước khi thay đổi vật mài hoặc kéo dài thời gian chu kỳ, hãy xác định lỗi xuất hiện sau khi hoàn thiện. Việc khắc phục phụ thuộc vào vấn đề thực tế.
| Lỗi | Nguyên nhân có thể | Cần kiểm tra gì | Điều chỉnh khuyến nghị |
|---|---|---|---|
| Vết lõm nhỏ hoặc vết va đập | Va chạm giữa các chi tiết hoặc vật mài quá nặng | Tải mẻ, tỷ lệ chi tiết so với vật mài, chiều dài chi tiết | Tăng hỗ trợ vật mài, giảm tải, hoặc dùng vật mài nhẹ hơn |
| Các cạnh ngoài sáng nhưng rãnh vẫn mờ | Vật mài không tiếp cận được các vùng lõm | Độ sâu rãnh, hình dạng vật mài, kích thước vật mài | Thử vật mài có thể đi vào rãnh mà không bị kẹt |
| Cạnh bị bo tròn quá mức | Tác động cắt hoặc thời gian chu kỳ quá mạnh | Bán kính cạnh, cấp độ vật mài, thời gian hoàn thiện | Rút ngắn giai đoạn cắt và thêm giai đoạn đánh bóng nhẹ hơn |
| Bề mặt mờ hoặc xám | Bột nhôm mịn, nước bẩn hoặc hợp chất không phù hợp | Độ trong của nước, nồng độ hợp chất, độ sạch của vật mài | Cải thiện rửa sạch và dùng hợp chất an toàn cho nhôm |
| Vật liệu mài bị kẹt trong lỗ | Kích thước vật liệu mài gần bằng kích thước lỗ hoặc rãnh | Đường kính lỗ, chiều rộng rãnh, kích thước vật liệu mài | Thay đổi kích thước hoặc hình dạng vật liệu mài và cải thiện khả năng tách |
Sử dụng đủ vật liệu mài để bảo vệ chi tiết
Đối với các chi tiết xe máy bằng nhôm, vật liệu mài không chỉ có tác dụng cắt bề mặt. Nó còn có chức năng đệm và tách các chi tiết. Nếu mẻ xử lý có quá nhiều chi tiết và không đủ vật liệu mài, các chi tiết có thể va chạm trực tiếp và tạo ra các vết va đập nhìn thấy được.
Một máy rung hoàn thiện bề mặt có thể xử lý các chi tiết xe máy một cách hiệu quả, nhưng tỷ lệ nạp liệu phải được kiểm tra. Các tay đòn dài và giá đỡ nên di chuyển cùng vật liệu mài, không được va vào nhau lặp đi lặp lại trong thùng.
Chọn vật liệu mài theo hình dạng và mục tiêu bề mặt
Nhôm mềm hơn thép, vì vậy vật liệu mài quá mạnh có thể loại bỏ vật liệu quá nhanh. Đối với các chi tiết xe máy trang trí hoặc bề mặt dễ nhìn, vật liệu mài nhựa thường là lựa chọn khởi đầu an toàn hơn vì nó nhẹ hơn và ít mài mòn hơn so với vật liệu cắt nặng.
Vật liệu mài gốm có thể hữu ích khi ba via mạnh hơn hoặc bề mặt đúc thô ráp, nhưng cần được thử nghiệm cẩn thận trên các cạnh mỏng, lỗ và bề mặt trang trí. Hình dạng vật liệu mài cũng rất quan trọng: vật liệu phải tiếp cận được các rãnh và lỗ mà không bị kẹt.
Tách công đoạn phá ba via và đánh bóng làm sáng
Một sai lầm phổ biến là kỳ vọng một quy trình mạnh có thể vừa loại bỏ ba via vừa tạo ra bề mặt sáng bóng cuối cùng. Đối với các chi tiết xe máy bằng nhôm, điều này có thể gây bo cạnh quá mức và độ bóng không đồng đều.
Một quy trình ổn định hơn có thể sử dụng hai giai đoạn. Giai đoạn đầu loại bỏ ba via và làm mịn các vết gia công hoặc đúc. Giai đoạn thứ hai cải thiện độ sáng bằng vật liệu mài nhẹ hơn, hợp chất hoặc quy trình đánh bóng.
Hợp chất và quá trình rửa ảnh hưởng đến vẻ ngoài của nhôm
Nhôm có thể trở nên xám hoặc mờ nếu bụi kim loại và dung dịch bẩn còn bám trên bề mặt. hợp chất hoàn thiện giúp làm sạch chi tiết, giữ các hạt mịn lơ lửng, cải thiện độ bôi trơn và giảm hiện tượng ố bề mặt.
Nếu chi tiết trông đạt yêu cầu trong máy nhưng trở nên xỉn sau khi rửa hoặc sấy, hãy kiểm tra chất lượng nước, nồng độ hợp chất, lưu lượng rửa và tốc độ sấy. Độ sáng bề mặt không chỉ là vấn đề của vật liệu mài.
Các lỗi phổ biến cần tránh
- Nạp quá nhiều chi tiết dài cùng lúc và gây va chạm giữa các chi tiết.
- Sử dụng vật liệu mài quá mạnh trên các bề mặt nhôm trang trí.
- Kéo dài thời gian chu trình đến mức các lỗ và cạnh bị bo quá mức.
- Chọn vật liệu mài mà không kiểm tra kích thước lỗ, độ sâu rãnh và chiều rộng khe.
- Bỏ qua nước bẩn và bụi nhôm trong quá trình hoàn thiện ướt.
- Cố gắng đạt được việc loại bỏ ba via và độ sáng cuối cùng trong một bước quy trình.
Phương pháp thử nghiệm được khuyến nghị
Kiểm tra các bộ phận xe máy với hình học sản xuất thực tế, không chỉ các mẫu khối đơn giản. Kiểm tra đầu cần gạt, các cạnh mỏng, lỗ lắp, rãnh trang trí, góc trong và các bề mặt nhìn thấy sau mỗi lần thử.
- Bắt đầu với thời gian chu kỳ vừa phải và kiểm tra cạnh dễ hỏng nhất trước.
- So sánh ít nhất hai dạng vật liệu mài nếu các rãnh hoặc lỗ vẫn còn mờ.
- Giảm mật độ tải nếu xuất hiện vết lõm hoặc vết tiếp xúc.
- Thêm một giai đoạn đánh bóng thứ hai nếu bề mặt mịn nhưng chưa đủ sáng bóng.
- Ghi lại vật liệu mài, hóa chất, lưu lượng nước, tỷ lệ tải và thời gian chu kỳ để tái sản xuất.
Giải pháp liên quan
Nếu bạn đang phát triển quy trình cho các bộ phận xe máy bằng nhôm, các trang này có thể giúp bạn so sánh các máy móc, vật liệu mài, hóa chất và thiết bị sấy phù hợp:
Cần quy trình đánh bóng cho các bộ phận xe máy bằng nhôm?
Gửi cho chúng tôi ảnh chi tiết, hợp kim nhôm, vị trí ba via, kích thước lỗ và rãnh, tình trạng bề mặt hiện tại, độ sáng mục tiêu và số lượng lô. JINTAIJIN có thể giúp xem xét liệu quy trình của bạn có cần vật liệu mài khác, phương pháp tải nhẹ hơn hoặc quy trình hoàn thiện hai giai đoạn hay không.
Liên hệ đội ngũ hoàn thiện của chúng tôi để được hỗ trợ đánh bóng chi tiết xe máy
 +86-592-2381506


 Mạng IPv6 được hỗ trợ